Pages

Thursday, October 31, 2013

Iron-On Vinyl

Hello, friends.  Marilyn here with a product review of iron-on vinyl.  I have never used it before, so here we go...  My tip:  Never give up trying new things!  Such fun!

What is needed:
  • Iron-on vinyl.  I purchased mine at Hobby Lobby for $14.99.  What you get is one large sheet of glitter iron-on vinyl.  It is layered with a sticky clear sheet that is needed when applying the vinyl to your clothing.
  • Clothing to apply the vinyl onto.  I purchased a package of four baby onesies, sized 3-6 months.  Tip: Make sure to wash and dry the clothing before applying the vinyl.
  • Iron.  Set to cotton temperature.  Make sure the steam button is in the OFF position.
  • Cricut Image.  I used an image from Cricut Brooklyn Iron-on cartridge.

  • Place iron-on glitter vinyl on your mat and cut with blade set to 3, speed-low, pressure-medium.  My image came from Cricut Brooklyn Iron-on cartridge [bow-tie1] .  I cut it at 4".    Tip:  make sure your image has been "flipped" before cutting. 

  • Weed the vinyl - remove all the negative cut pieces.  Unlike regular vinyl, you will not need transfer tape for this product.

  • Iron your clothing for about 15 seconds before applying the vinyl.  It will pre-warm the clothing making it ready to receive the vinyl.  Set your iron to the cotton setting.  Make sure the steam button is in the off position.
  • Position your image and iron for about 30 seconds.  Turn the clothing over and iron on the backside for another 30 seconds. 
  • Lift up the clear coating to make sure everything sticks to the clothing.  If not, just iron a little longer. 

  • Remove all the clear plastic coating and admire your work. 

All-in-all I would give this product a thumbs-up.  Easy to use and really looks nice after applied.

  • Now I have a baby gift ready for wrapping.  Better make a card to go along with it.


A2 sized card
Cricut Brooklyn Iron-on cartridge
Card recipe:
  • Mat 1 (blue) = 5 3/8" x 4 1/8".
  • Mat 2 (white) = 4.75" x 3.5".  Mat embossed with Cuttlebug "Geometric" folder.
  • Mat 3 (white) = 4.75" x 3.5".  Hand cut at top in the center and fold down the corners to create a "collar."
  • Bow Tie and Buttons = cut at 4" from Cricut Brooklyn Iron-on cartridge [Bow Tie1]. 
  • Place form tape under collar corners to hold in place.

Inside of Card
Inside of Card:
  • Mat 1 (blue) = 4.75" x 3.5".
  • Mat 2 (white) = 4.5" x 3.25".
  • Sentiment = from Cloud9 Designs "Simple Thoughts" stamp set.
Just to be fair - Girl version. 

Girl Version - Iron-On Glitter Vinyl in Pink
  • Created by welding images from Forever Young and Brooklyn Iron-On.  Letter "K" from CCR Basics.
  • Forever Young = image from Forever Young [jewelry] is at 3".
  • Brooklyn Iron-On = image from Brooklyn Iron-On [Tie] is at 4".  Hide contour on tie part and keep the collar.
  • After cutting, cut again with Letter "K" at .5" from CCR Basics.
Onesie in Greeting Card Box


Thank you for visiting my blog today.  As always, comments are welcomed and appreciated!

~ Marilyn


Wednesday, October 30, 2013

Decorative Vinyl Tray

Hello, Friends!  Marilyn here with a tutorial on using vinyl to create a decorative tray.  My tip:  Measure Twice, Cut Once... not original but definitely applies when cutting vinyl.

Here is what I used:
  • Vinyl - silver vinyl.  I ordered this through eBay.
  • Transfer Tape. 
  • Tray - black wooden tray I found on sale at Michaels two years ago. 
  • Cricut Cartridge - Songbird. 


  • First step is to measure the tray and determine what size font will fit.
 
Cricut Craft Room software
  • In the Cricut Craft Room (CCR), I selected the font text from Songbird Cricut Cartridge.  I changed the Letter Spacing to -22 in order to weld the letters together.  I then made the length 9.9".
  • Next, I cut the font text out using card stock to make sure I was happy with the size.

  • Once satisfied with the sizing, I cut the font text using vinyl. 
  • Settings for cutting vinyl:  blade 3, speed low, pressure medium

  • Weed and remove all the negative cuts.

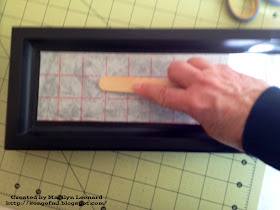
  • Place transfer tape over the weeded vinyl.  Rub with the tool provided in the vinyl to make sure everything is attached.

  • Remove from Cricut mat and place vinyl onto the tray using the transfer tape.  Rub well with the tool provided.

  • Remove the transfer tape.  Pulling at an angle is the easiest method.

  • And there you go. 

  • Angels always makes my name look nicer.


Thank you for joining me today.  I hope you enjoyed the tutorial.  As always, comments are welcomed and appreciated!

~ Marilyn

Saturday, October 26, 2013

Save the TaTa's Blog Hop

Welcome to the Scrapbook Blessings Club... Save the TaTa's blog hop!


If you are jumping in the middle, you can start at the beginning at www.scrapbookblessings.blogspot.com, but hopefully you hopped over from Cindy's blog.  So let's get started...

It's October and Breast Cancer Awareness Month. I'm sure that many have been touched by this dreaded disease. We need to have Awareness for Mammograms for early detection. SO, with that being said, the talented Design Team and Facebook members of Scrapbook Blessings Club are ready to strut their stuff and show you just how easy it is to use the Tic Tac Toe Board in the SBC FB group as inspiration.


Here is the card that I did using the Tic Tac Toe Board:

A2 sized card = 5.5" x 4.25"
Cricut Graphically Speaking cartridge
Card Recipe:
  • Mat 1 (pink) = 5 3/8" x 4 1/8".
  • Mat 2 (wood panel pattern) = 5 1/4" x 4".  Paper from My Mind's Eye "Dolled Up."
  • Ribbon = from Michaels
  • Gems = 3 pink gems from Walmart
  • Flower = created using Martha Stewart punch.  Center created using Liquid Pearls.

  • Panel = cut at 2" from Cricut Graphically Speaking cartridge; [Image13] found on page 40 of the folder.  Brad from Michaels.  Panel is mounted with foam tape.

Inside of Card
Inside of Card:
  • Mat 1 (pink) = 5" x 3.75".
  • Mat 2 (flower pattern) = 4.75" x 3.5".  Paper from My Mind's Eye "Dolled Up" pack.
  • Mat 3 (white) = 4.5" x 3.25".
  • "Sweet Girl" = cut at 4" from Cricut Graphically Speaking cartridge; [Image13-s] found on page 40 of the folder. 
  • Flower = from Martha Stewart punch.  Center of flower from Liquid Pearls.


Hopefully this inspires you to remember to get the TaTa's checked when you see pink!!! Your next stop is Gloria.

Oh, did I mention that there will be a little prize given by Lynne Kirsch of a cross which she makes using her Embroidery Machine to one lucky person that comments.  Also, THE STAMPING CHEF is giving away the Fighter digi stamp too!  Just leave a comment and we would love if you followed the blogs but it is not a requirement.

If you would love to play along with the tic tac toe card game, you can share it in the special album in the Scrapbook Blessings Club Facebook group for a second prize offered by Lynne.

Here is the entire blog list:


Wednesday, October 23, 2013

Wedding Bouquet Keepsakes

Hello, Friends!  Marilyn here with a tutorial on preserving the bride's bouquet after the wedding.  My tip:  make sure your flowers are dried before using a dried floral preservative.

Shadow Box Keepsake

Here is what I used:
  • Shadow Box.  Mine is 8" x 10" and was purchased in a set of three from Michaels.
  • Vinyl - mine is brown to match fall wedding colors
  • Dried Floral Preservative - used to preserve the color and texture of the wedding bouquet flowers.  I used Gemini Masterpiece Dried Floral Preservative purchased at Hobby Lobby for $5.99. 
  • Hot Glue / Hot Glue Gun
  • Designer Paper Scraps - left over from the wedding invitations and bridal shower
  • Cricut Cartridges - Beyond Birthdays, Doodlecharms and Storybook


Bridal Bouquet Shadow Box
  • Spray your dried flowers with Gemini Masterpiece Dried Floral Preservative.  Do this outside, this stuff is potent! 
  • Cut background paper at 8" x 10".  I used ATG to tape right on to the back.  The designer paper was used in the bride's wedding invitations.
  • Heart = cut image and shadow at 5 1/2" from Cricut Doodlecharms [heart] found on page 85 of the folder.  Paper is again from the bride's invitations and decorations.
  • Glue and Hot Glue flower petals onto the heart.
  • Pearl band around heart - the pearls came from a roll purchased at Hobby Lobby.  We used the pearl strands originally on decorations for the wedding reception.  I just hot glued here and there to attach.
 
  • Bead Swatch - came from bride's bouquet.  I hot glued a portion onto the background.  A small flower blossom is attached to the top.
  • Date = cut date (10 19 13) at 1 1/2" from Cricut Storybook cartridge.  Shimmery Paper is from banner paper used at the bridal shower.
  • "love" = cut from brown vinyl and attached to outside of the glass.  Cut came from Cricut Beyond Birthdays cartridge and was cut at 2", [love] found on page 132 of the folder. 
 

Christmas Ornament

Here is what I used:
  • Clear Christmas Ornaments - set of 12 purchased at Hobby Lobby for $7.99
  • Dried Flowers from the bridal bouquet
  • Ribbon

  • Pull top of ornament off and insert flower petals.  I used tweezers to move the petals around to my liking.

  • Tie ribbon to top.  Ribbon from wedding decorations.

I hope you enjoyed todays tutorial.  As always, comments are welcomed and appreciated!

~ Marilyn


Monday, October 21, 2013

Flower Magnets

Hello, Friends!  Today I created some magnets for my refrigerator using the Cuttlebug Daisy Quilling Kit.  My tip for this project is to use the correct sized Cuttlebug plates.  You'll need the longer ones to make this go smoothly.

Here is what is needed:
  • Cuttlebug or other die cutting machine
  • Cuttlebug Quilling Kit (I used the Daisy.  Other flowers are available)
  • Cuttlebug 6" x 13" Plates.  Both C and B plates are needed.
  • White Glue
  • E-6000 Glue
  • Magnets (I used .5 diameter magnets)


Magnet Recipe:
  • Die cut all pieces using different colored card stock.  The picture above shows all the different die cuts included in the Quill Kit.


  • Start with the flower center.  The quilling tool is included in the kit.  Twirl around and around, adding white glue here and there along the way.
  • Once the center is complete, continue with the next flower layer (orange card stock in this picture).  Just glue to the end of your quill center and twirl around adding white glue along the way.


  • The final layer is once again added and twirled.  Secure the end with white glue.

  • Open the petals and add some leaves to your flower.  There were some places that looked a little bare to me, so that's where I attached my leaves.  I think that if I had quilled a little tighter there would have been less open spaces.  My leaf ends were inked with Tim Holtz Tea Dye Distress Ink before attaching with white glue.

  • You will need one .5 inch round magnet.

Use caution when applying E-6000 glue
  • Attach the magnet to the back of the flower with E-6000 glue.  This stuff is permanent, so be careful and don't get any on your self or your work area. 

Group of magnets on my refrigerator
  • All done!  My daisy has joined other flower magnets made with the Cuttlebug Quilling Kits.  Some shown have stickles added to petal and leaf tips.

Thank you for joining me today.  As always, comments are welcomed and appreciated!

~ Marilyn


Sunday, October 20, 2013

SBC Twisted Easel Card

The challenge today at Scrapbook Blessings Club is to create a twisted easel card.  Instructions as well as an example are provided by Mary with CardzTV on YouTube.  

  • Video Inspiration:  Twisted Easel, Mary with CardzTV
  • Digi Stamp:  Bugaboo Digi Stamps
  • Designer Paper:  My Mind's Eye "Oxford Lane" 6"x6" pack.
  • Sentiment:  Scrappy Mom's "Designer's Choice" stamp set.
  • Punch:  Martha Stewart
  • Other:  Tim Holtz Tea Dye Distress Ink.  Liquid Pearls.

Twisted Easel folded = 5.5" x 4.25".
Bugaboo Digi Stamp

Card Recipe:
  • Card Base:  9 3/4" x 4 1/4".  Score at 5 1/2".  On short end, score diagonally.
  • Card Front:  5 1/2" x 4 1/4".
  • Mat 1 (flower design) = 5 1/4" x 4".
  • Mat 2 (green hash design) = 4 3/4" x 3 1/2".
  • Mat 3 (solid green under image) = 3 1/4" x 3 1/4".  White gel pen used for faux stitching.
  • Mat 4 (flower design border) = 1/4" x 5 1/4".


  • Digi Stamp = Butterfly image is from Bugaboo Digi Stamps.  Image was resized to 3" x 3" and  colored using glitter pens and colored pencils.
  • Flower = created using Martha Stewart punch.  Center is Liquid Pearls.

Inside of Card
Inside of Card:
  • Mat 1 (flower design) = 1 3/4" x 3 3/4".
  • Mat 2 (white) = 1 1/2" x 3 1/2".
  • Sentiment "Butterfly Kisses" = from Scrappy Mom's "Designer's Choice" stamp set.
  • Flowers = created with Martha Stewart punch.  Center of flowers is Liquid Pearls.  Flowers mounted with foam tape to make card stop.

Thank you for joining me today!  As always, your comments are welcomed and appreciated!

~ Marilyn

Thursday, October 17, 2013

Hola Chica

I'm trying out the new-to-me Cricut Cartridge Animal Kingdom.  I'm loving the easy assembly of the cuts in this cartridge.

  • Cricut Cartridge:  Animal Kingdom
  • Designer Paper:  My Mind's Eye "Cambridge Court" 6"x6" pack
  • Sentiment:  Scrappy Mom's "Designers Choice" stamp set
  • Other:  Tim Holtz Tea Dye Distress Ink

A2 sized card = 5.5" x 4.25"
Cricut Animal Kingdom cartridge


Card Recipe:
  • Mat 1 (dark blue) = 5 3/8" x 4 1/8"
  • Mat 2 (checkered) = 5 1/4" x 4"
  • Mat 3 (border) = 1" x 4"
  • Corner = hand cut from paper scrap

  • Sentiment "Hola Chica" = from Scrappy Mom's "Designers Choice" stamp set
  • Chicken = cut image and shadow at 2.75" from Cricut Animal Kingdom cartridge; [chickn] found on page 90 of the folder.  Image is mounted with foam tape.  Shadow was inked with Tim Holtz Tea Dye Distress Ink.

Inside of Card

Inside of Card:
  • Mat 1 (dark blue) = 5" x 3.75"
  • Mat 2 (white) = 4.75" x 3.5"
  • Corner = hand cut from scrap
 
 
Thank you for visiting my blog today.  As always, comments are welcomed and appreciated.

Monday, October 14, 2013

CAS Fall Card

Hello, Friends!  Today I created a CAS (clean and simple) card.  My tip for you today is this:  Make your cards a little generic, that way they can be used for multiple occasions.  For example, my card's sentiment simply say's "Celebrate Everyday."  This card is now eligible to be used as a Fall, Thanksgiving or even a Birthday Card.

  • Cricut Cartridge:  A Child's Year
  • Designer Paper:  My Mind's Eye "Indie Chic"
  • Embossing:  Cuttlebug "Houndstooth" folder
  • Sentiment:  Hero Arts CL498
  • Twine:  Baker's Twine
  • Other:  Tim Holtz Tea Dye Distress Ink
A2 sized card = 5.5" x 4.25"
Cricut A Child's Year
Card Recipe:
  • Mat 1 (navy blue) = 5.25" x 4".
  • Mat 2 (beige) = 5" x 3.5".  Mat was first stamped with sentiment then embossed using the Cuttlebug "Houndstooth" folder.  Edges inked with Tim Holtz Tea Dye Distress Ink.  Mat is mounted with foam tape.
  • Sentiment "Celebrate Everyday" = from Hero Arts CL498 stamp set.
 
  • Leaf = cut at 2" from Cricut A Child's Year cartridge; [Garden2][Icon-s] found on page 36 of the folder.
  • Twine = Baker's Twine.


Inside of Card
Inside of Card:
  • Mat 1 (navy blue) = 5" x 3.75"
  • Mat 2 (beige) = 4.75" x 3.5".  Edges inked with Tim Holtz Tea Dye Distress Ink
  • Leaf = cut at 1.5" from Cricut A Child's Year cartridge; [Garden2][Icon-s] found on page 36 of the folder.

I hope you enjoyed today's card and are inspired to make your own CAS card.  As always, your comments are welcomed and appreciated!  


Hope you have a blessed day and thanks for stopping by,

~ Marilyn

Drive-In

I recently purchased an older cartridge "Nifty Fifties" and decided to make a birthday card using the Drive-In image.
  • Cricut Cartridge:  Nifty Fifties
  • Embossing:  Cuttlebug "Charles" folder
  • Designer Paper:  Echo Park "This and That" 6"x6" pack
  • Sentiment:  Scrappy Mom's "Hooray for Birthdays" stamp set
  • Other:  Tim Holtz Tea Dye Distress Ink.  Liquid Pearls.

A2 sized card = 5.5" x 4.25"

Card Recipe:
  • Mat 1 (red) = 5 3/8" x 4 1/8"
  • Mat 2 (yellow polka dot) = 5 1/4" x 4"
  • Mat 3 (camera design) = 3" x 4"
  • Mat 4 (red under image) = 3 1/4" 3 1/4"
  • Mat 5 (turquoise) = 3" x 3".  Mat embossed using Cuttlebug "Charles" folder
  • Mat 6 (yellow polka dot border) = 1" x 3"
  • Ribbon = from Michaels

  • Drive-In = cut at 2.75" from Cricut Nifty Fifties cartridge; [DriveIn] found on page 58 of the folder.  Image is mounted with foam tape.
  • Sentiment Mat = hand cut to size of sentiment.  Approximately 1.25" x 2.75".  Edges inked with Tim Holtz Tea Dye Distress In.  Corners rounded at 1/4".  Liquid Pearls used for accent.

Inside of Card:
  • Mat 1 (red) = 5" x 3.75"  White gel pen used for faux stitching.
  • Mat 2 (white) = 4.75" x 3.5"
  • Red Arrow = cut at 2.75" from Cricut Nifty Fifties cartridge; [DriveIn-s] found on page 58 of the folder.  White gel pen used for faux stitching.

Thank you for visiting my blog today.  And as always, your comments are welcomed and appreciated.


Sunday, October 13, 2013

Happy Birthday!

Birthday card created for my daughter's upcoming birthday in November. 

  • Cricut Cartridges:  Plantin Schoolbook and Pretty Pennants
  • Designer Paper:  Recollections
  • Punch:  Martha Stewart balloon punch
  • Sentiment:  Inkadinkado "Humorous Birthday" stamp set.
  • Twine:  Friendship Twine (purchased at Walmart in children's craft section)

A2 sized card = 5.5" x 4.25"
Cricut Plantin Schoolbook
Cricut Pretty Pennants

Card Recipe:
  • Polka Dot Strips = cut each at 1" x 4".  I started out with a 4" x 5" square cardstock and attached each strip to it.  Then rounded the corners at 1/2" before mounting to the card base.
  • Pennant = cut at 2.25" x 4.5" from Cricut Pretty Pennants cartridge.  I used my Gypsy to resize the image; the Cricut Craft Room (free software) can also be used to do resizing.
  • Balloon = from Martha Stewart punch.  Image punched three times and layered together to create a chipboard effect.  Bow twine is Friendship Twine (purchased at Walmart in children's craft section).  Balloon image mounted with foam tape.
 
  • "happy" = letters cut at 1" using Cricut Plantin Schoolbook cartridge; [Roly Poly] feature used.  Each letter cut three times and layered together before attaching.  This gives the letters a chipboard effect.
  • Sentiment "Birthday!" = partial of "Happy Birthday" sentiment found on the Inkadinkado stamp set "Humorous Birthday."  I placed scotch tape over the "Happy" portion when inking.  Tape is then removed before stamping.

Inside of Card
Inside of Card:
  • Mat 1 (yellow polka dots) = 5" x 3.75".  Corners rounded at 1/2".
  • Mat 2 (white) = 4.75" x 3.5".  Corners rounded at 1/2".
  • Balloons = from Martha Stewart punch.

Thank you for joining me today!  As always, comments are welcomed and appreciated!

~ Marilyn