Here is what I used:
- Vinyl - silver vinyl. I ordered this through eBay.
- Transfer Tape.
- Tray - black wooden tray I found on sale at Michaels two years ago.
- Cricut Cartridge - Songbird.
- First step is to measure the tray and determine what size font will fit.
 |
| Cricut Craft Room software |
- In the Cricut Craft Room (CCR), I selected the font text from Songbird Cricut Cartridge. I changed the Letter Spacing to -22 in order to weld the letters together. I then made the length 9.9".
- Next, I cut the font text out using card stock to make sure I was happy with the size.
- Once satisfied with the sizing, I cut the font text using vinyl.
- Settings for cutting vinyl: blade 3, speed low, pressure medium
- Weed and remove all the negative cuts.
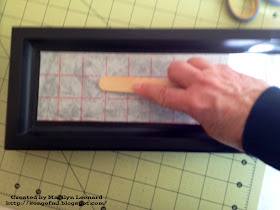
- Place transfer tape over the weeded vinyl. Rub with the tool provided in the vinyl to make sure everything is attached.
- Remove from Cricut mat and place vinyl onto the tray using the transfer tape. Rub well with the tool provided.
- Remove the transfer tape. Pulling at an angle is the easiest method.
- And there you go.
- Angels always makes my name look nicer.
Thank you for joining me today. I hope you enjoyed the tutorial. As always, comments are welcomed and appreciated!
~ Marilyn


