Directions for designing:
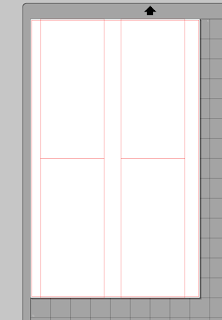
I used Silhouette software to create this design. For each side of the bow you will need to make two rectangles 3.2" wide and 7" tall. Stack rectangles on top of one another. Copy these two rectangles for other side of bow.
Open up Pattern Fill Window and fill each rectangle. The top rectangles will be your loops and the bottoms will be your bow tails. I purchased this digital paper pack from an Etsy shop and copied the images into My Patterns folder within Silhouette.
Add any additional images or text you would like on your bows. Don't forget to "reverse" before printing onto your sublimation paper.
Print on legal size 8.5" x 14" sublimation paper. Once printed cut down center of paper in order to heat press the bow.
Your bow will need to be 3" wide white grosgrain ribbon. Cut to a 30" length. Before heat pressing I cut the spikes on the tails.
Place sub transfer paper on top of one end of the ribbon and heat press at 400 degrees for 60 seconds. I use a little heat tape to hold in place. Remove transfer paper. Repeat for other end of ribbon.
Note* Align the ribbon ends to bottom of transfer. Once done you'll have two ends of the ribbon pressed with the images and there will be a 2" white section in the center that is unpressed. This will be the center of your bow.
Folding and assembling the cheer bow:
Best way to learn is to follow this YouTube - it's how I did mine.
Enjoy!


