Friday, December 26, 2014

Silhouette Knock-Out Technique

Hello, Friends!  Marilyn here with a technique that may be new to some of you.  Those who use it call it the knock-out technique.

Here is an example of what the knock-out technique looks like.

Silhouette Knock-Out Design Technique
To create my example, I first typed out the "Happy New Year" in black using a thick font (I used Impact).  The line spacing will need to be adjusted to make the lines closer to each other.

Then I typed 2015 in blue using the font Arial.  The colorful confetti was purchased and downloaded from the Silhouette store.

Design #17667 from Silhouette Store

I color filled the confetti and placed around the 2015 text.

Step 1 - design 


Next place the 2015-confetti design on top of the Happy New Year text and duplicate - you'll need two copies of your design for this effect.

Step 2 - place 2015-confetti design on top of Happy New Year and create an extra copy.
Highlight the top design and choose "crop".  You'll notice that your left over pieces are all black.  You'll need to group and color-fill the top design again.

Step 3 - crop the top design.  Recolor all the pieces and group.

Using your second copy, highlight and choose "subtract".  Regroup all the pieces once done.

Step 4 - subtract using the second copy.  Regroup once done.

Now place the top design on top of the bottom aligning in the blank spots.

Step 5 - align two designs on top of each other and group again.

Once aligned, you get your final knock-out design.

I used my knockout image to make a New Year's t-shirt.  But, you could also use it on a card or any other project.

Knock-Out design applied to a t-shirt.


Thank you for joining me today! ~ Marilyn


Monday, December 1, 2014

SBC December Card Kit


It is our monthly card kit reveal time. Scrapbook Blessings Club is joining up with Scrapping For Less, and we are bringing you affordable Mini CARD KITS!!! 


We are doing things a little differently this month. All you have to do is:

  •  checkout the video and the awesome cards that DT Sandy and DT Marilyn made
  • leave a comment on the SBC Card Kit Video and be a SBC Channel Subscriber
  •  IF you leave a comment on this blog and on Marilyn's blog, you will get 2 more chances to win (3 in total!)
Sandy- SBC Craft Room 

Marilyn - Marilyn's Crafts


Here is this month's video


Check out the projects I was able to do with this great kit!


Card #1 - I used the Penguin stamp as well as the sentiment stamp.  The tree was also included in my kit.  


Card #2 - The snowflakes and bling are all from the kit as well as the pop-up Polar Bear.


Card #3 - I can't get enough of the adorable Penguins!


*******************************************************************
  • To purchase your card kit, you can click below to place your order. 
$15.00 includes shipping
https://www.facebook.com/media/set/?set=oa.573346762764426&type=1

 Card Kit


  • Don't want to be bothered with ordering each time? Do you want to make sure you get your kits mailed out on the 2nd of each month? Then try our pre-paid auto ship program for 3 months at a time. You will be sent an invoice for your 3 month subscription as well as the shipping so you can get your kits right away! Total for 3 month subscription only 45.00!

~~~~~~~~~~~~~~~~~~~~~~~~~~~~~~~~~~~~~~~~~~~~~~~~~~~~~~~

Did you see the video and leave your comments?

WINNER WILL BE ANNOUNCED JAN 1ST


I hope your enjoyed today's project too. If you have a questions or suggestions, please leave it in the comments. Also, you can join up to our Facebook group: Scrapbook Blessings Club for more fun, games, inspiration, tips and techniques. Thank you for stopping by and have a blessed day!

Saturday, November 29, 2014

Charlie Brown and Pig Pen T-Shirt

I made this friendship t-shirt for one of my relatives.  Everyone loves Charlie Brown!


Thanks for visiting today! ~ Marilyn

Saturday, November 22, 2014

Turkey T-Shirt

Hello, Friends!  Thanksgiving will be here this week!  Wow, how this year flown by!  I have so many things in my life to be thankful for that I literally fall asleep at night thanking God.  Family is at the top of my list.

At my job this week we had a Snack Day / Potluck Day.  I thought I would make myself a fun turkey shirt to wear.

Turkey T-Shirt

I found this cute turkey file on a Facebook group, but you can also purchase it on Etsy.  The original version is all brown.  I added the color-filled background as well as coloring the bow on top of the turkey.  The original version also comes with a blank center as the creator had envisioned it being filled with a monogram.  I went to Tagedo and keyed in "gobble and wobble" to make my Word Art center.

Once designed, I heat pressed my imaged.

Hope you all have a blessed Thanksgiving this year! ~ Marilyn

Saturday, November 8, 2014

DIY Closet Dividers

Hello, Friends!  Today I'm sharing how to create clothes dividers for baby's closet.

Baby Closet Dividers


Here's hat You'll Need:

  • Blank Plastic Closet Rings.  I purchased 50 of them for $23.19 here.
  • Template for design.  You can find 3.5" templatWe designs all over the internet. Here's an example.
  • Designer Paper.  In my case, I used Square1 Printable.  
  • Mod Podge (unless using Square1 Printable)


Step 1:  Get the Blank Plastic Closet Divider Rings.

3.5" blank plastic closet dividers.  Purchased on Amazon.


Step 2:  Download 3.5" closet divider template.

Step 3:  Design, Print and Cut.

Open Template in Silhouette & Color Fill

Frame color-filled in gray.  Text uses "Precious" font.

Select and set cut style as "Cut Edge".  

Make sure Registration Marks are set on.  Then print and cut.

Step 4:  If you are using Designer Paper, you won't need to to the color-fill step above.  Attach your cut-on design to your blank divider using Mod Podge.  I made my designs on Square1 Printable, so I just peeled and pressed right on to the blank divider.

Note:  You'll need two of each size so that your finished closet divider will have a matching front and back.


The 3.5" dividers fit perfectly on my standard sized closet bars.  ~ Marilyn

Saturday, November 1, 2014

SBC November Card Kit

Welcome to


It is our monthly card kit reveal time. Scrapbook Blessings Club is joining up with Scrapping For Less, and we are bringing you affordable Mini CARD KITS!!! 


Here is a quick peak of this months kit
(kit will vary in paper/die cuts)

Check out the projects I was able to do with this great kit!

Card #1 - Merry & Bright.  The sentiments and candle stamp are included with this month's kit.  Top part of the candle was fussy cut from scraps of the background designer paper. 


Card #2 - Merry, Merry, Merry.  The bells are from a stamp in this month's kit.  After water coloring, I fussy cut it out and mounted it with foam tape.  

Card #3 - There are so many pretty designer papers included in this month's kit.  I made this design using left over scraps from several of the papers.  The sentiment is mounted with foam tape.


-----------------------------------------------------------------------------------------------
It is perfect for all levels of scrapbookers! So whether you are a newbie or an experience scrapper, these kits has everything you'll need to create fast and easy projects. All you need to do is get out your scissors, paper trimmer and adhesive.

Why card kits? A couple reasons, one is getting fabulous papers and embellishments from popular Scrapbooking Companies, without buy a ton that you never use and letting it all just sit in the drawer.


  The second is cost. I am a frugal scrapbooker and affordability is always high on my list.  It is not always easy to spend $30- $50 on a kit. 

Our kits will be $15.00 which INCLUDES shipping!


And lastly is convenience, with these kits, there is no guess work in getting papers to coordinate along with embellishments and fabrics, etc.

 Who doesn't love fun and affordable--papers, flowers, chalk inks, brads, chalkboard, stamps, buttons.. more!! Every month you get something a little different! 
~~~~~~~~~~~~~~~~~~~~~~~~~~~~~~~~~~~~~~~~~~~~~~~~~~~~~~~~~~~~~~~~~~~


Now for the most important detail...What is November's Card Kit and how do you get it?!?!

  • Check out the Card Kit video (above) plus many inspiration pieces made by the SBC DT!
  • To purchase your card kit, you can click below to place your order. 
$15.00 includes shipping
https://www.facebook.com/media/set/?set=oa.573346762764426&type=1


Click here to purchase


  • Don't want to be bothered with ordering each time? Do you want to make sure you get your kits mailed out on the 2nd of each month? Then try our pre-paid auto ship program for 3 months at a time. You will be sent an invoice for your 3 month subscription as well as the shipping so you can get your kits right away! Total for 3 month subscription only 45.00!
********************************************************************************
 If you leave a comment on each blog and come back here letting us know, you will be entered in the random drawing for one October Card Kit prize.


Blog List:

Sandy- A Working Mom's Joy

Marilyn - Marilyn's Crafts

Brenda- Disney Girl


Did you join the hop and leave your comments? Come back here and let us know!

ScrapBook Blessings Club

WINNER WILL BE PICKED AND POSTED ON NOV 4TH!


Hope you have a blessed day and thanks for stopping by,
  Scrapbook Blessings Club
I hope your enjoyed today's project too. If you have a questions or suggestions, please leave it in the comments. Also, you can join up to our Facebook group: Scrapbook Blessings Club for more fun, games, inspiration, tips and techniques.

Thank you for stopping by and have a blessed day!

~ Marilyn
SBC Design Team Member

Friday, October 10, 2014

Santa Sack

Hello, Friends!  Marilyn here with a Saturday Project.  Today I made a "Santa Sack".  I found multiple examples of Santa Sacks on Pinterest and then made my own.  Santa Sacks are usually used to put your child's gifts in that come from Santa.  The sack is placed under the Christmas tree on Christmas Eve and is found by the child on Christmas morning.

My Santa Sack will be used as part of a classroom Bingo prize in an upcoming school carnival.

Santa Sack

To make my project, I first purchased the canvas bag at Hobby Lobby today for $8.99 before using
my 40% off coupon.


Next I went to the Silhouette store and looked through Christmas images before deciding upon this little Elf.  I added some snowflakes and a Naughty / Nice check box.  All the images were designed and printed using Silhouette Cameo and Square1 Iron-On.


Once everything was print and cut out, I layed out my design and heat pressed it onto the canvas bag.


Square1 Iron-On can be applied using a regular iron as well as a heat press.  If heat pressing, set your temperature to 325 degrees and press for 10 seconds.

Thank you for stopping by!  ~ Marilyn

Wednesday, October 1, 2014

SBC October Card Kit


It is our monthly card kit reveal time. Scrapbook Blessings Club is joining up with Scrapping For Less, and we are bringing you affordable Mini CARD KITS!!! 

Here is a quick peak of this months kit


Check out the projects I was able to do with this great kit!


Card #1
Cute little squirrel stamp that I water colored.  I took some of the designer paper and cut out leaves for my embellishments.  The squirrel image is mounted with foam tape.


Card #2:
Here's the squirrel stamp again along with sprinkle enamel dots and a die-cut fall saying.


Card #3:
This fall card uses several of the designer papers included in the kit.  The leaves were cut using scraps from the kit's papers.  The die-cut is mounted with foam tape.


Home Decor # 1:
This is a decorated 3.5" wooden block decorated using items from this month's kit.


-----------------------------------------------------------------------------------------------
It is perfect for all levels of scrapbookers! So whether you are a newbie or an experience scrapper, these kits has everything you'll need to create fast and easy projects. All you need to do is get out your scissors, paper trimmer and adhesive.

Why card kits? A couple reasons, one is getting fabulous papers and embellishments from popular Scrapbooking Companies, without buy a ton that you never use and letting it all just sit in the drawer.


  The second is cost. I am a frugal scrapbooker and affordability is always high on my list.  It is not always easy to spend $30- $50 on a kit. 

Our kits will be $15.00 which INCLUDES shipping!


And lastly is convenience, with these kits, there is no guess work in getting papers to coordinate along with embellishments and fabrics, etc.

 Who doesn't love fun and affordable--papers, flowers, chalk inks, brads, chalkboard, stamps, buttons.. more!! Every month you get something a little different! 


~~~~~~~~~~~~~~~~~~~~~~~~~~~~~~~~~~~~~~~~~~~~~~~~~~~~~~~~~~~~~~~~~~~

Now for the most important detail...What is October's Card Kit and how do you get it?!?!

  • Check out the Card Kit video (above) plus many inspiration pieces made by the SBC DT!
  • To purchase your card kit, you can click below to place your order. 
$15.00 includes shipping
https://www.facebook.com/media/set/?set=oa.573346762764426&type=1


 Card Kit

  • Don't want to be bothered with ordering each time? Do you want to make sure you get your kits mailed out on the 2nd of each month? Then try our pre-paid auto ship program for 3 months at a time. You will be sent an invoice for your 3 month subscription as well as the shipping so you can get your kits right away! Total for 3 month subscription only 45.00!
 If you leave a comment on each blog and come back here letting me know, you will be entered in the random drawing for one October Card Kit prize.


Blog List:

Sandy- A Working Mom's Joy

Marilyn - Marilyn's Crafts

Cindy - In Love with PAPER

Carolyn- Granny Ma's Creative Blog

Teresa- Fresh and Renewed

Brenda - Disney Girl


~~~~~~~~~~~~~~~~~~~~~~~~~~~~~~~~~~~~~~~~~~~~~~~~~~~~~~~

Did you join the hop and leave your comments? Go back to SBC and let us know!

ScrapBook Blessings Club

WINNER WILL BE PICKED AND POSTED ON OCT 4TH during our 1st B-day party!


Hope you have a blessed day and thanks for stopping by,
  Scrapbook Blessings Club

Saturday, September 27, 2014

Car License Plate

Hello, Friends!   Recently my granddaughter purchased her first car - a darling little Mini Cooper.   She looks totally adorable in it!    She named her sweet little ride "Sir Charles II".  Which is my inspiration for today's project.


Here's what I used for this project.

  • Blank license plate 
  • Square1 Printable
  • Green spray paint
  • Internet images
  • Silhouette software
  • Cameo cutter


Step 1:  Spray paint blue license plate a green color to match her car color.


Step 2:  Design image for license.  I found the UK lion image as well as the British flag and incorporated them together with her car's name.


Step 3:  Image was printed using Square1 Printable and applied directly to the license plate.


I hope you enjoyed my project!  ~ Marilyn

Saturday, September 20, 2014

Pumpkin Patch Home Decor

Hello, Friends!  Marilyn here with an autumn home decor project.


Here is what you'll need to make this:


  • Wooden Plaque - purchased at Michaels for $4.99 (with 50% coupon cost was $2.50)
  • Paint - purchased at Michaels.  Each color cost $ .33 each
  • Mod Podge
  • Images created with either Cricut or Silhouette
  • Twine for hanging


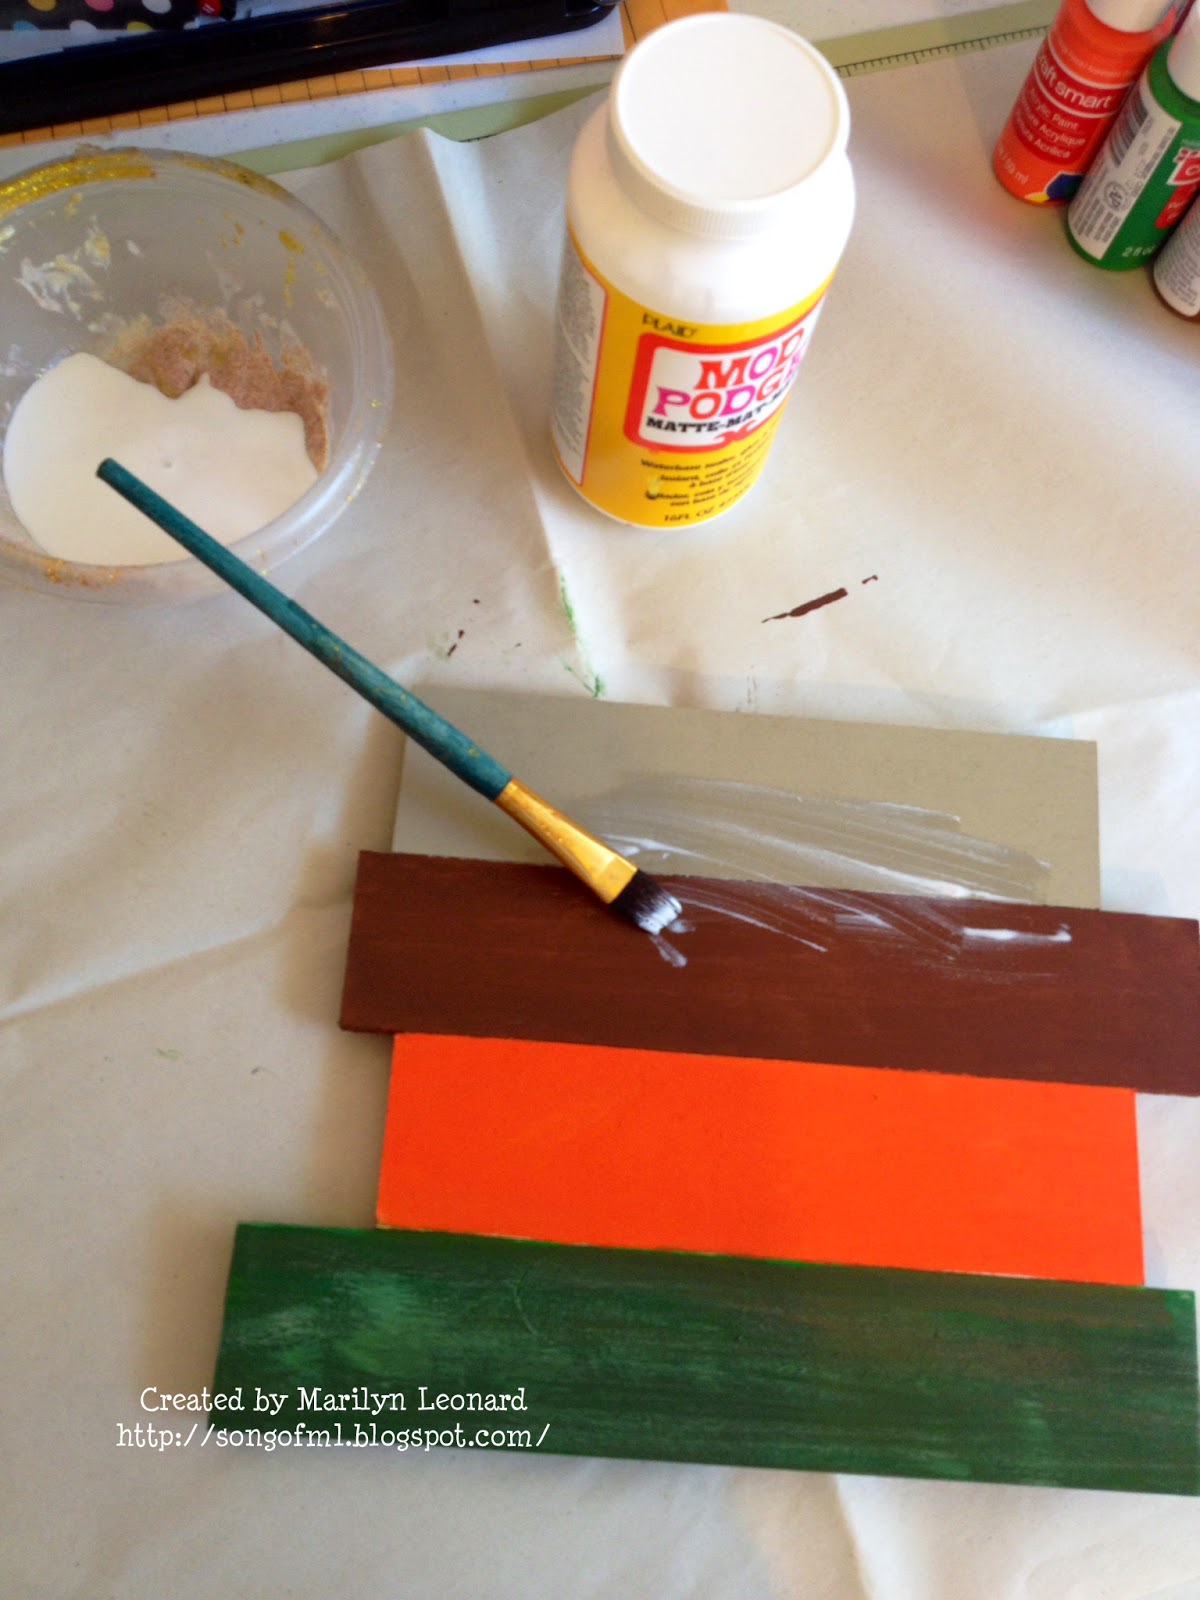
Step 1:  Paint your wooden plaque.  I selected green, orange, brown and tan.


Step 2:  While your wooden plaque is drying, create the images you'll use to decorate with.


Step 3:  Put a thin layer of Mod Podge on painted wooden plaque and lay your images on top.


Step 4:  Once the Mod Podge has dried, add some twine for hanging on back and enjoy!


Thank you for visiting today! ~ Marilyn