Thursday, February 27, 2014

Bow Easy Product Review

Hello, Friends!  Marilyn here with a product review on the Bow Easy.

My tip will be coming at the end of this post.


You can make seven different bow sizes with this one product:  3/4", 1", 1 1/4", 1 3/8", 1 3/4", 2, 3/8", 2 3/4".   I've had mine for a couple of years and really love it.   Back then it cost $5.95.  I'm not sure how much they are today.


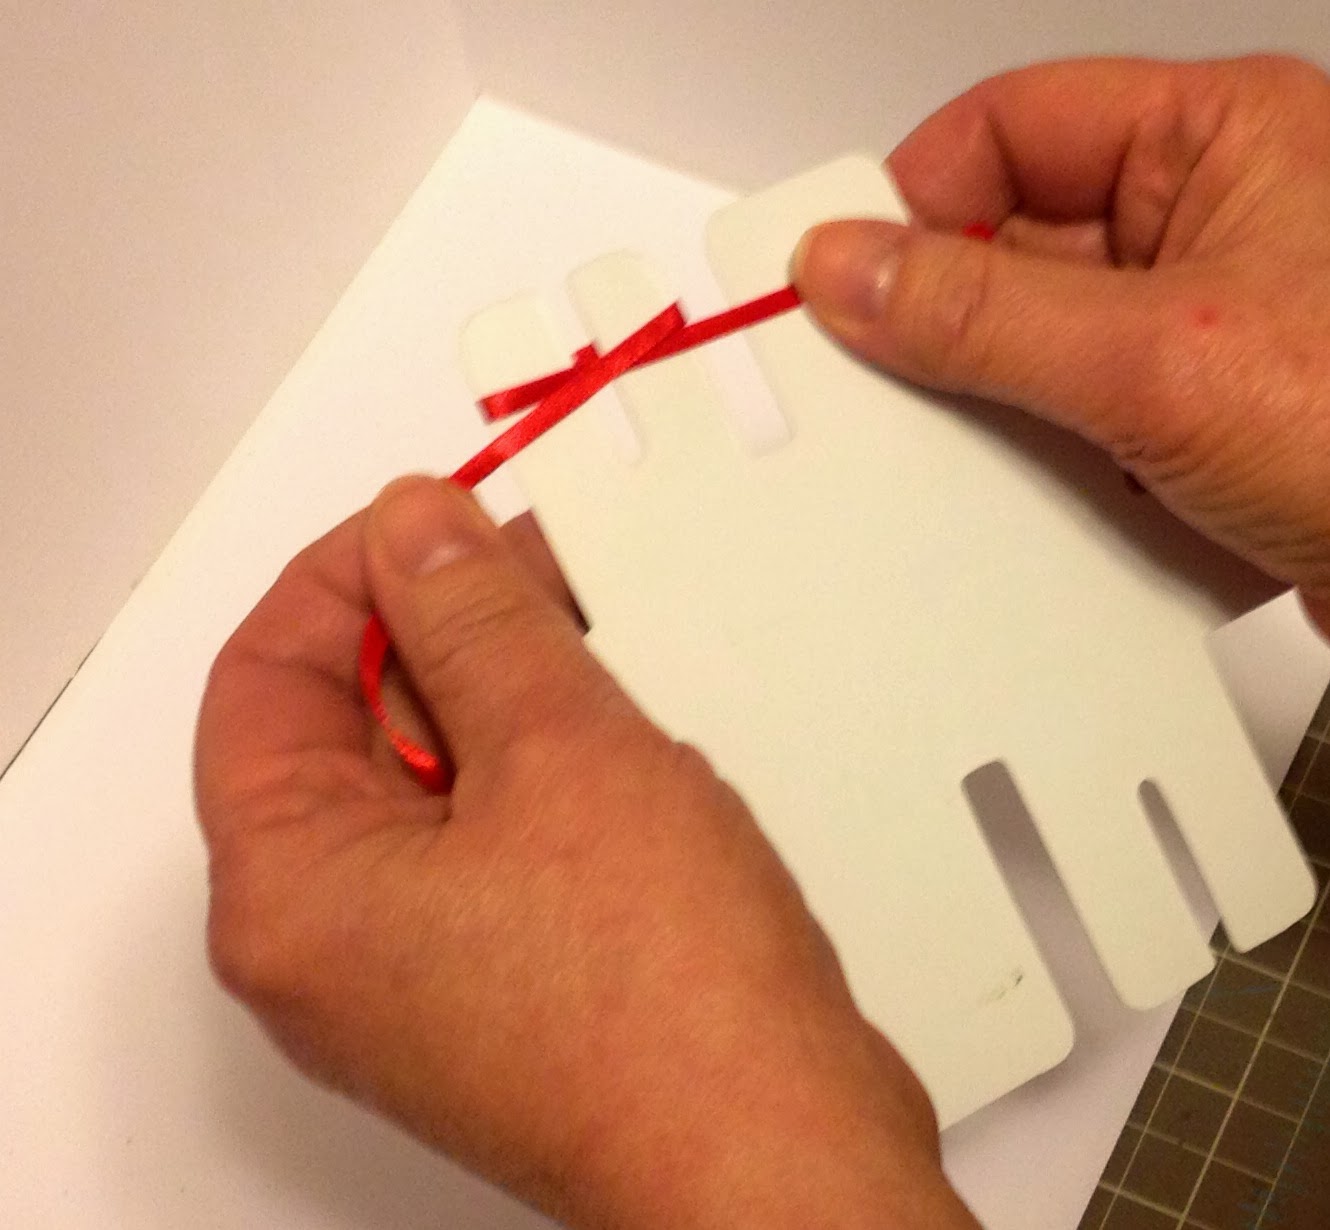
To make a bow:  Wrap your ribbon around Bow Easy, holding the tail with your free thumb.  (I'm left handed, so my right thumb is securing the tail in this picture.)


Push leading end through the rabbit hole (space under the ribbon).


Pull through and over the top.


Leading ribbon edge goes through the loop and then pull tight.


Ta-Da!  Cute small ribbon.   Just slide off and put on your project.

What's that you say?   You didn't quite get how this works?  Or, you're right handed?
Here's my tip:  A video tutorial published by someone else:

Bow Easy Video Tutorial.

I hope you enjoyed today's tutorial.   If you have any questions, leave a comment below and someone will get back to you.

Thank you and God Bless!

~Marilyn

Saturday, February 22, 2014

Howdy Horse Silhouette

Hello, Friends.  I created this card back on Super Bowl Sunday.  It was suppose to root the Denver Broncos on to victory - LOL!   That certainly didn't work out!


  • Sketch:  Operation Write Home Sketch #192
  • Horse Image:  Internet source that was traced
  • Wheat Image:  Clearly Digi
  • Designer Paper:  Clearly Digi


  • Sentiment:  Computer Generated
  • Mat for Sentiment attached with foam tape.


  • View of Inside of Card


Thank you for joining me today. . . I hope your team won in the Super Bowl!

~ Marilyn

Monday, February 17, 2014

Go For the Gold - USA!

Hello, Friends!  I'm so excited and happy for our USA Winter Olympians.   I was inspired to create a "Gold For The Gold" card in their honor.  Tip:  Find your inspiration this week and make a card.

A2 sized card = 5.5" x 4.25"
Card Recipe:

  • Mat 1 (red) = 5.25" x 4"
  • Mat 2 (white) = 5" x 3.75"
  • Mat 3 (blue) = 4.75" x 3.5"
  • Mat 4 (blue border with stars) = 4.75" x .5"; glitter pen used on stars to make them "twinkle".


  • Sentiment = computer generated
  • USA Map = outline of USA filled with internet USA flag.   White offset added.  Image is 2.24" x 3.6".


Inside of Card
Inside of Card:

  • Mat 1 (blue stars) = 5" x 3.75"
  • Mat 2 (red) = 4.75" x 3.5"
  • Mat 3 (white) = 4.5" x 3.25"


Thank you for stopping by my blog today.  As always, comments are welcomed and appreciated!

~ Marilyn

Sunday, February 16, 2014

Zig Zag Fold

Hello, Friends!  Today I'm joining the other DT members of Scrapbook Blessings Club as we showcase different card folds.  The design team will all be using the really fun digi stamps from Wags and Whiskers ~ adorable! ~ 

My card was created using the Zig Zag fold.  I found the instructions for creating my card from a tutorial on Operation Write Home.


Card Recipe:
  • Cut card stock at 5.5" x 12".
  • Score fold lines at 4" and 8".
  • Measure 1.75" from left edge and cut diagonally up to the 8" score line.
  • Fold on score lines.
Decorative panels:
  • Small (yellow polka dots):  3.75" x 3.25".  Measure 1.5" on left side and cut diagonally up to 3.75".
  • Middle (green polka dots):  3.75" x 5.25".  Measure 3.25" on left side and cut diagonally up to 5.25".
  • Large (red polka dots):  3.75" x 5.25".


  • Girl, Cat and Bubbles:  digi from Wags and Whiskers, sized at 3".  I did the fussy cutting with the assistance of my Silhouette.  After cutting, image was colored using color pencils.  Girl and cat are mounted with foam tape.  Bubbles has stickles and mod podge dimensional added.
  • Sentiment:  from Cardztv "Hugs and Kisses" stamp set.
  • White panels:  both same size.  4.25" x 3.25".  Measure 3" on left edge and cut diagonally up to 4.25".
Thank you for visiting my blog today!  Comments are always welcomed and appreciated!

~ Marilyn

Sunday, February 2, 2014

Love Is In The Air - ATC

Hello, Friends!  The challenge over at Scrapbook Blessings Club this is to create a card or layout using the theme "Love Is In The Air".   The design team are all creating ATC cards using this theme.


  • Theme:  Love Is In The Air - Scrapbook Blessings Club
  • Tip:  If you don't have chipboard, create your own by gluing together 3 pieces of regular card stock.
  • ATC:  Artistic Trading Card - 3.5" x 2.5"
  • Birdcage:  Miss Kate's Cuttables
  • Accents:  ribbon, clear glitter pen


ATC Recipe:

  • Base / Chipboard:  I cut three pieces of card stock; 3.5" x 2.5" and glued them to each other.
  • Mat 1 (red / blue star pattern) = 3.5" x 2.5"
  • Mat 2 (blue card border) = 3.5" x 2.5"
  • Mat 3 (red border) = 2.5" x .25"


  • Birdcage:  from Miss Kate's Cuttables.  Image sized at 2.875" in height.  Three birdcages were cut and glued together to create a thicker image.   Bars of cage outlined using clear glitter pen.  Bird colored with colored pencil.


  • Small ribbon & bow glued to top of cage.


Thank you for visiting my blog today!  As always, comments are welcomed and appreciated.

~ Marilyn